Malwarebytes Install on macOS
The download link will open up your web browser and, in some occasions, may ask your permission to download from the cloud location. Click on Allow.

Once the download is complete, double click on it to run the installer. At the installation prompt, click Continue.

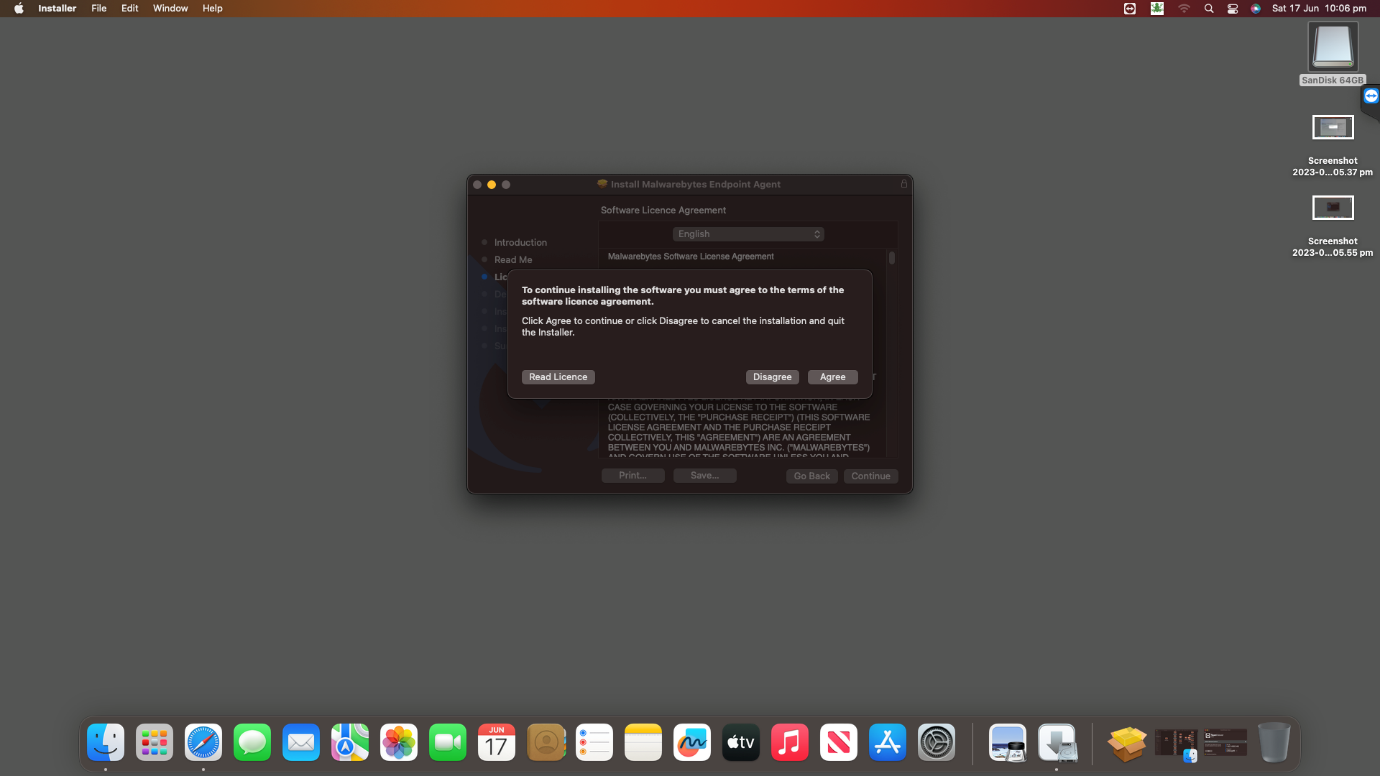
Next you will need to click on Agree on the Software license terms.
Next click on the Install button

You will need to enter the login Password at the next prompt. Once done click Install Software.

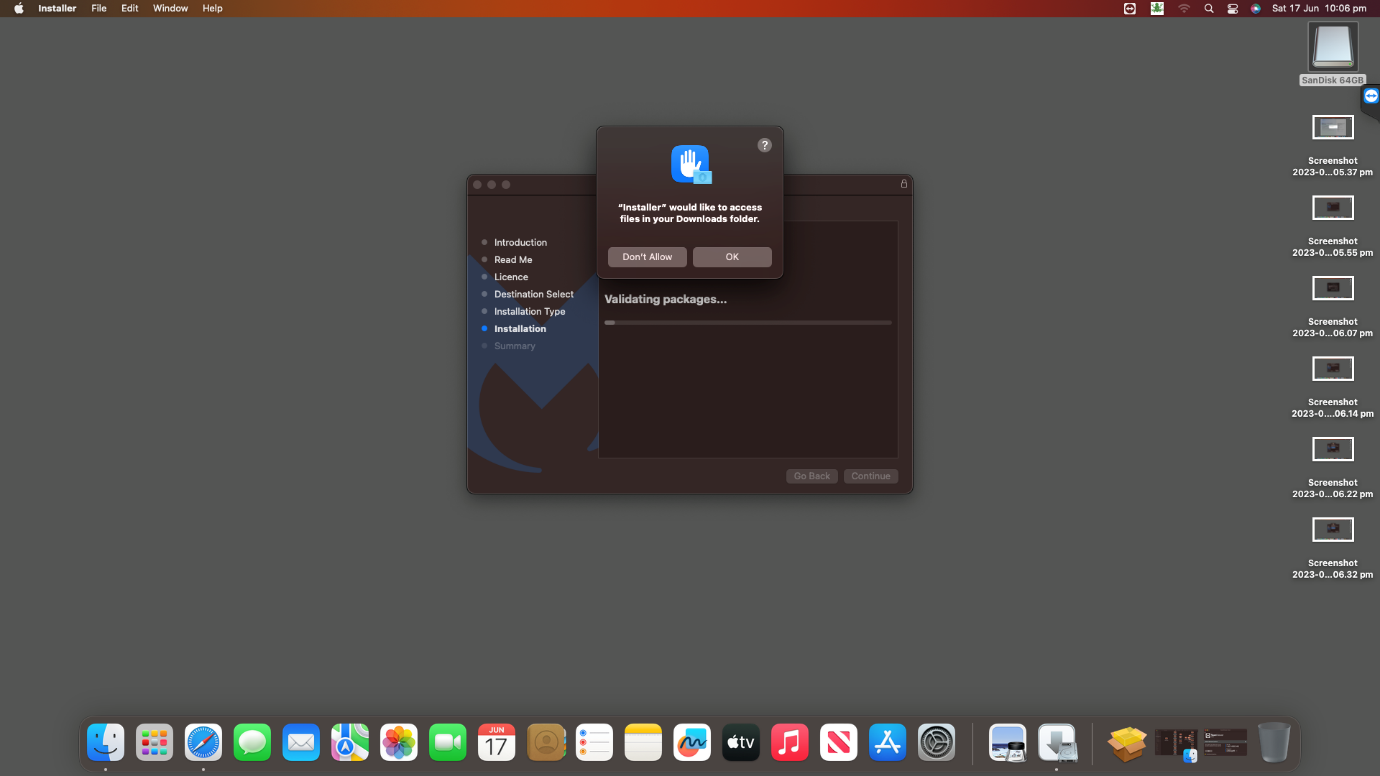
The Installer will ask for permission to access the downloads folder, click Ok at the prompt. This is only temporary and will only last till the install is complete.
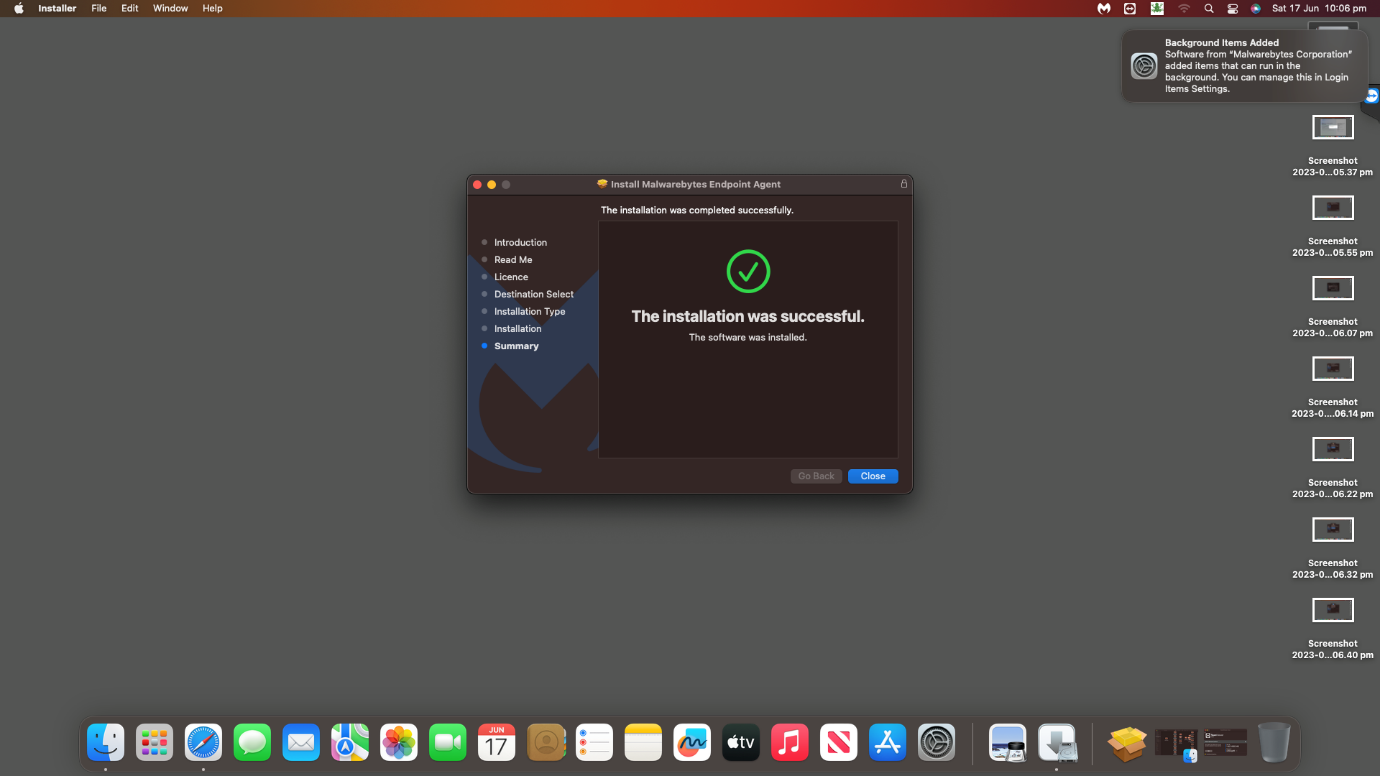
If all goes well, you will get an Install Successful message.
Next click on Move to Bin as we no longer require the Installer.

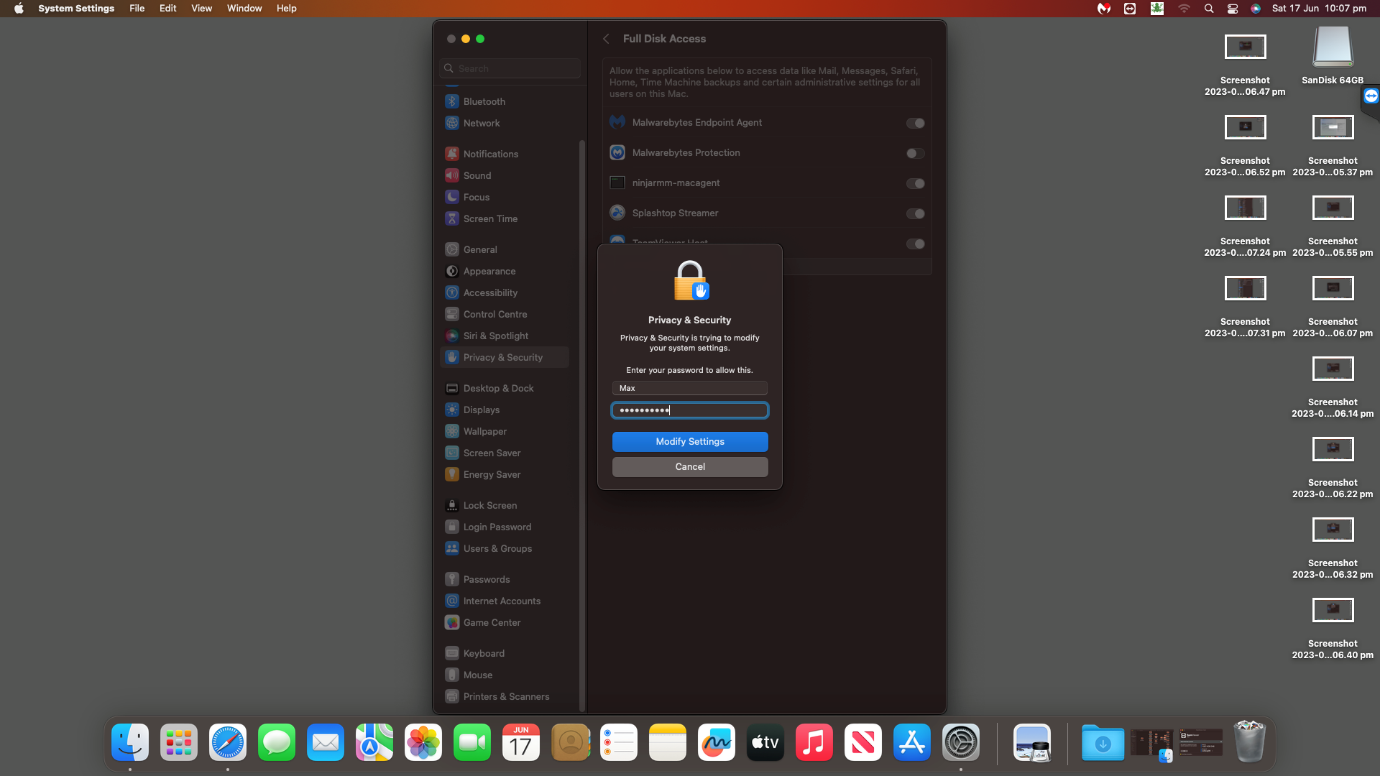
Next click on Settings and look for Security and Privacy.

Once you find it, click on Full Disk Access, under Full Disk Access toggle the switch to On for Malwarebytes Endpoint Agent and Malwarebytes Protection. This is required for Malwarebytes to be able to read and scan the disk.

You may get a password prompt when trying to turn the toggle switch to On, simply enter the password to proceed.
Soon after you will see a pop-up warning as below, click OK and proceed to the next step.

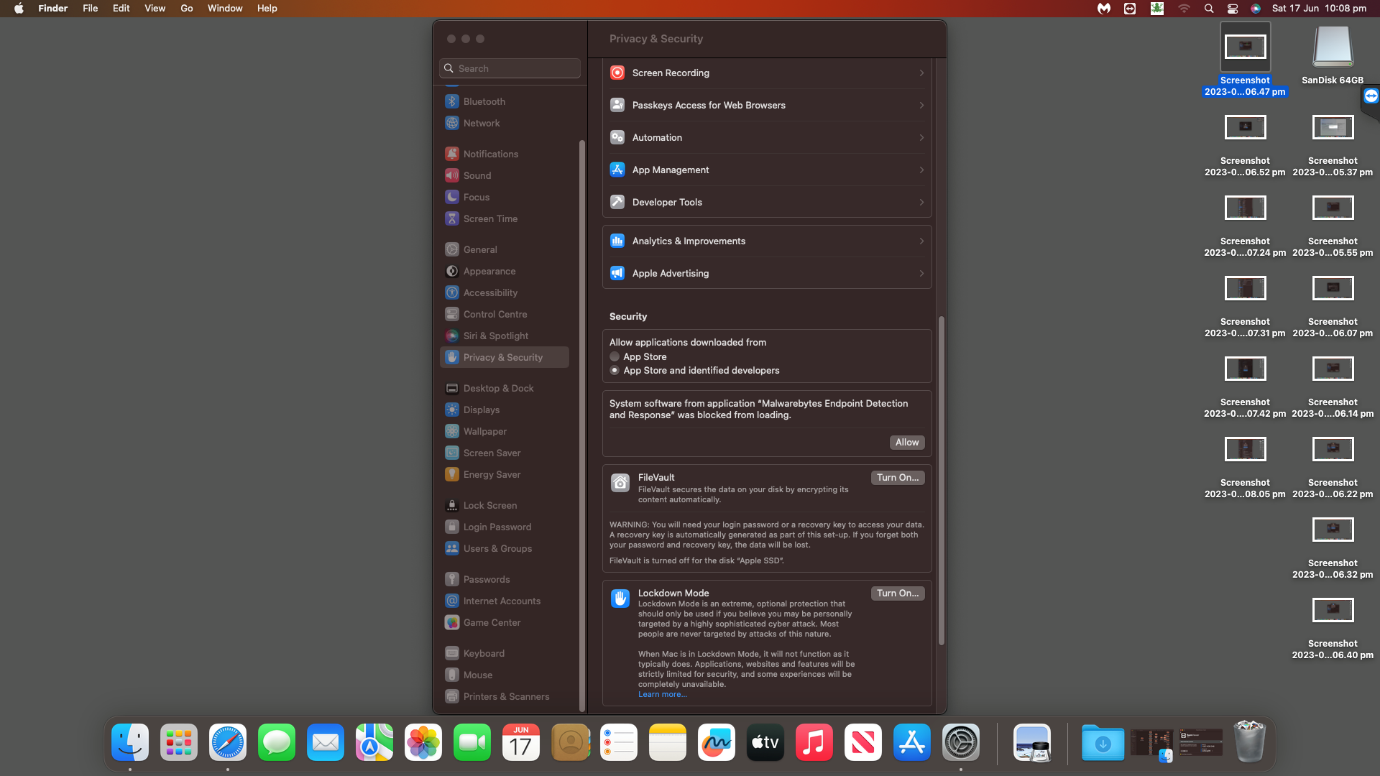
Under Security & Privacy, scroll down to the security section. You will see that the Malwarebytes Endpoint Detection and Response was blocked from loading, click on the Allow button next to it below to allow the application to load.
Next you will see a popup like below, click on Allow to grant Malwarebytes to start filtering web content. This will prevent malicious content from transmitting data in and out from your system.

That completes the Malwarebytes installation on your Mac.