Cleaning up old server hardware on a virtual machine (VM) after doing physical-to-virtual (P2V) conversions. When you perform a P2V conversion you are taking the operating system and encapsulating it inside a virtual machine. When you power it up on a virtual host afterwards the operating system wakes up and finds out it’s in a different home that has different server hardware and consequently proceeds to automatically load the correct drivers for all the new server hardware. Once that process is completed you typically need to reboot so all the new drivers can be loaded properly. If you go in to the device manager you will see all the new hardware devices, but you won’t see the old hardware devices. The reason for this is not because Windows deletes them — it simply hides them so you can’t see them.
Even if you select the Show Hidden Devices option in Device Manager you will not see the old hardware devices as it only displays non-Plug and Play devices that are actually present in the system. Devices that were previously installed but are not currently present in the server are not displayed. What you need to do to display them is to set an environment variable before you launch the Device Manager application.
You might be wondering why you should even remove them in the first place. There are two reasons. The first is that it can cause conflicts when you attempt to assign IP addresses to any new network adapters that are discovered. This is because the old network adapters are still configured on the server and still have their original IP addresses even though they are not physically present. You will not see them, however, when you go in to your network connections, and if you attempt to assign the new network adapter the same IP address as the old ones you will get an IP conflict error message. To resolve this you need to remove the old non-present adapters which will release the IP addresses assigned to them. Microsoft has a KB article that provides more detail on this.
The second reason you want to remove them is that the old non-present device drivers still consume server resources even though the devices are no longer physically present. The resource usage is minimal but when you have multiple virtual machines (VMs) running on a single physical server the resources that are wasted can add up. Fortunately removing those pesky old devices is fairly easy, just follow these steps:
1. Open a Windows command prompt and type the following:
set devmgr_show_nonpresent_devices=1
This sets an environment variable that tells the device manager to show all non-present devices.
2. At the same command prompt, type
devmgmt.msc
…which launches the device manager application. Do not try and launch it through the graphical user interface (GUI) instead as the environment variable set in step one only applies to commands run inside the command prompt.

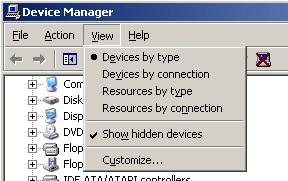
3. Once the device manager window opens, select View from the top menu, and then Show Hidden Devices.
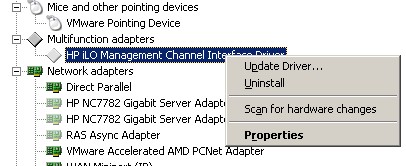
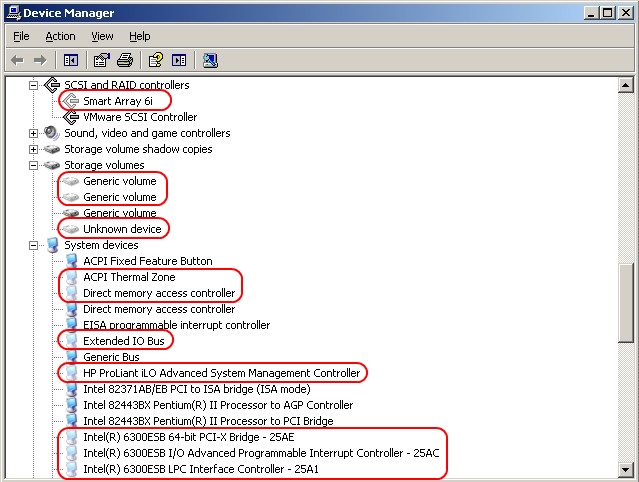
4. If you expand the device categories you will see both present and non-present devices. The non-present devices are shown by the grayed-out icons next to the device names. You can remove them by right-clicking on them and selecting Uninstall. Unfortunately you have to do this one by one as you can not select multiple devices. Click OK at the warning message that appears. If you accidentally delete a device that is present, don’t panic — once you reboot, Windows will automatically install the device driver for it again.
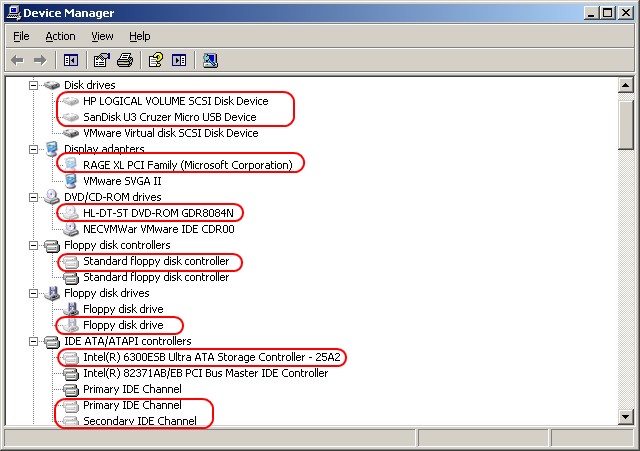
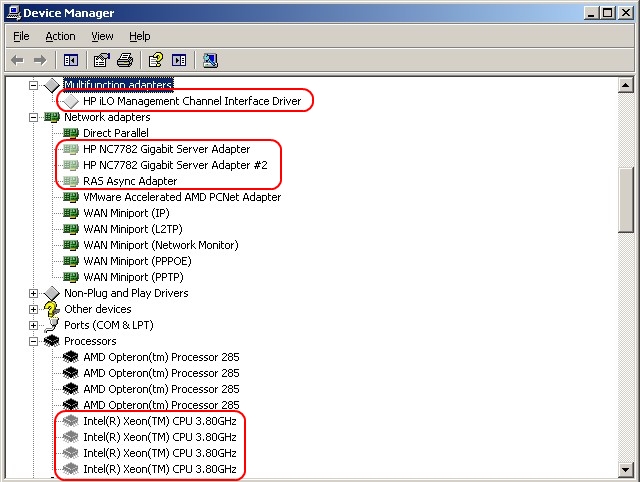
As an example of how many non-present devices there are after a P2V, I removed over 60 of them from a VM that came from an HP DL360 server, as you can see in the images below.
The process of removing these devices can be tedious and time-consuming, especially if you have many servers to do, but is worth doing so your new virtual servers are clean and don’t carry over remnants from their previous hardware.